
DIY Dryer Vent Cleaning: What Can Go Wrong (and When It's Fine)
The honest answer to "can I clean my own dryer vent?" is: sometimes. We clean dryer vents for a living, and we will still tell you that a basement dryer with a three-foot straight run does not need a truck in the driveway every single year. But we have also been called to homes where a weekend cleaning left the vent worse than it started — lint packed solid at an elbow, a joint knocked apart inside a ceiling, a torn hose quietly dumping moist air behind the dryer. Here is what goes wrong, why it goes wrong, and how to tell which side of the line your laundry room is on.
When Is DIY Dryer Vent Cleaning Actually Fine?
DIY is reasonable when you can see, reach, and understand the entire vent run — and when you are maintaining a working vent, not rescuing a clogged one. The classic safe case is a basement dryer that vents straight out through the rim joist a few feet away. In that setup, a hardware-store rotary brush paired with a shop vacuum can do a genuinely useful job between professional cleanings.
Your vent is a fair DIY candidate only if all of the following are true:
- The dryer sits in a basement or first-floor room and vents through the nearest exterior wall
- The total run is roughly eight feet or less, with no more than one elbow
- The duct is rigid or semi-rigid metal — not thin foil or plastic flex
- You can reach the exterior hood from the ground, no ladder required
- Your kit includes vacuum extraction — not just rods and a brush
- The dryer still dries in one cycle, so you are maintaining, not unclogging
If even one item fails, keep reading. Every failure mode in the next three sections comes from ignoring one of those six lines.
How Do Brush Kits Push Clogs Deeper Instead of Removing Them?
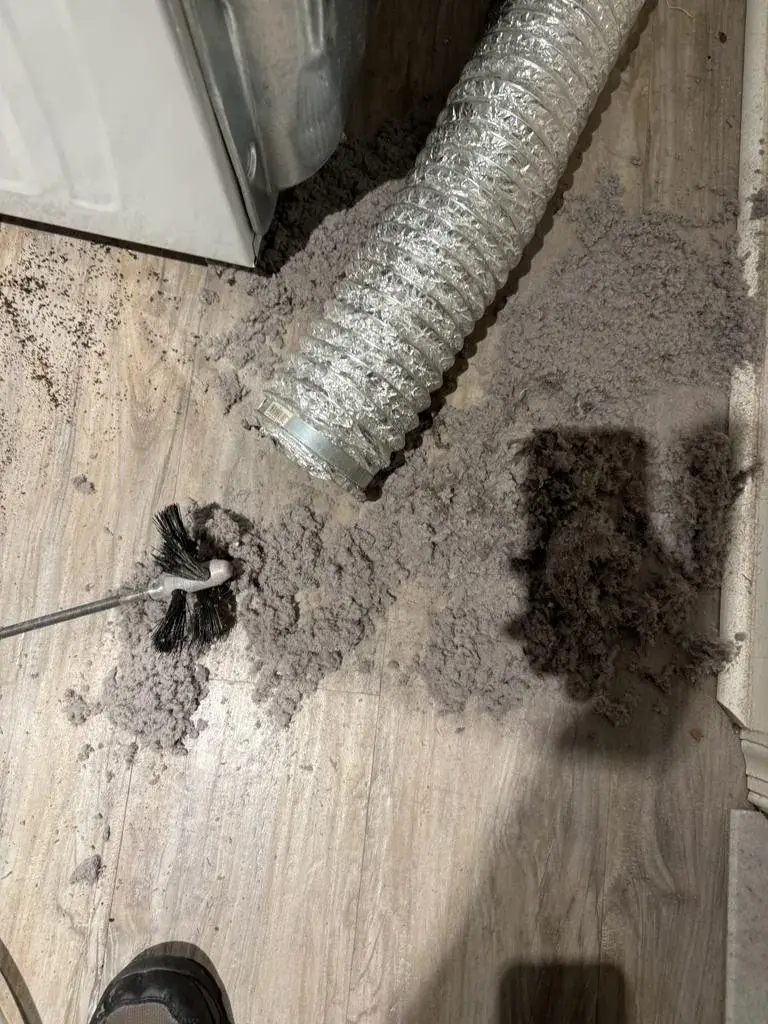
A rotary brush only loosens lint — something else has to carry it out of the duct. The kits assume the dryer's own airflow or your shop vacuum will do that job. On a short, straight run, it usually does. On a longer run, especially one that is already restricted, the brush can shove a growing plug of compacted lint ahead of itself like a plunger. When that plug reaches an elbow, it wedges — and now a vent that was 40 percent blocked is 100 percent blocked at a spot your rods struggle to reach.
The flexible fiberglass rods make this worse in a sneaky way: they follow the path of least resistance. In a heavily coated duct, the brush often bores a hole through the middle of the buildup rather than scrubbing the walls. The dryer breathes a little better for a week or two, the homeowner declares victory, and the ring of packed lint around that hole stays put — loosened, mobile, and ready to migrate downstream and mat over the exterior flap or screen.
This is why "my dryer got worse after I cleaned the vent" is a call we actually receive. Disturbed lint that never left the duct is more dangerous than lint that was never touched, because it moves — and because the homeowner now believes the vent is clean.
What Happens When a Joint Comes Apart Inside a Wall?
Any vent run longer than a few feet is built from sections of rigid pipe joined at seams and elbows, held together with foil tape or clamps. Some older installations were assembled with screws — a mistake in its own right, since screw tips protrude into the airstream and snag lint. Either way, those joints are the weak points, and a rotary rod spinning at drill speed can catch a seam or a screw tip and knock a section loose.
Do that in an exposed basement run and you will see it immediately. Do it inside a wall cavity or a ceiling chase and there is nothing to see — the run looks perfectly normal from both ends. Meanwhile the dryer is now exhausting warm, moist, lint-laden air into the framing. Moisture condenses on studs and the back of drywall. Lint piles up in a hidden cavity next to a heat source. With a gas dryer, combustion byproducts are going into that cavity too, instead of outside.
The tell is at the exterior hood: the dryer runs, but the flap barely moves and there is little or no warm airflow. Finding the separation means running a camera through the line, and fixing it often means opening drywall — a repair that costs many times what a routine professional cleaning does. Catching this kind of problem is exactly why we video-inspect every duct before we touch it; you can see how that works on our process page.
How Does Flex Duct Get Crushed or Torn During DIY Cleaning?
The flexible transition hose between the dryer and the wall is the most fragile part of the whole system, and it takes abuse from two directions during a DIY cleaning.
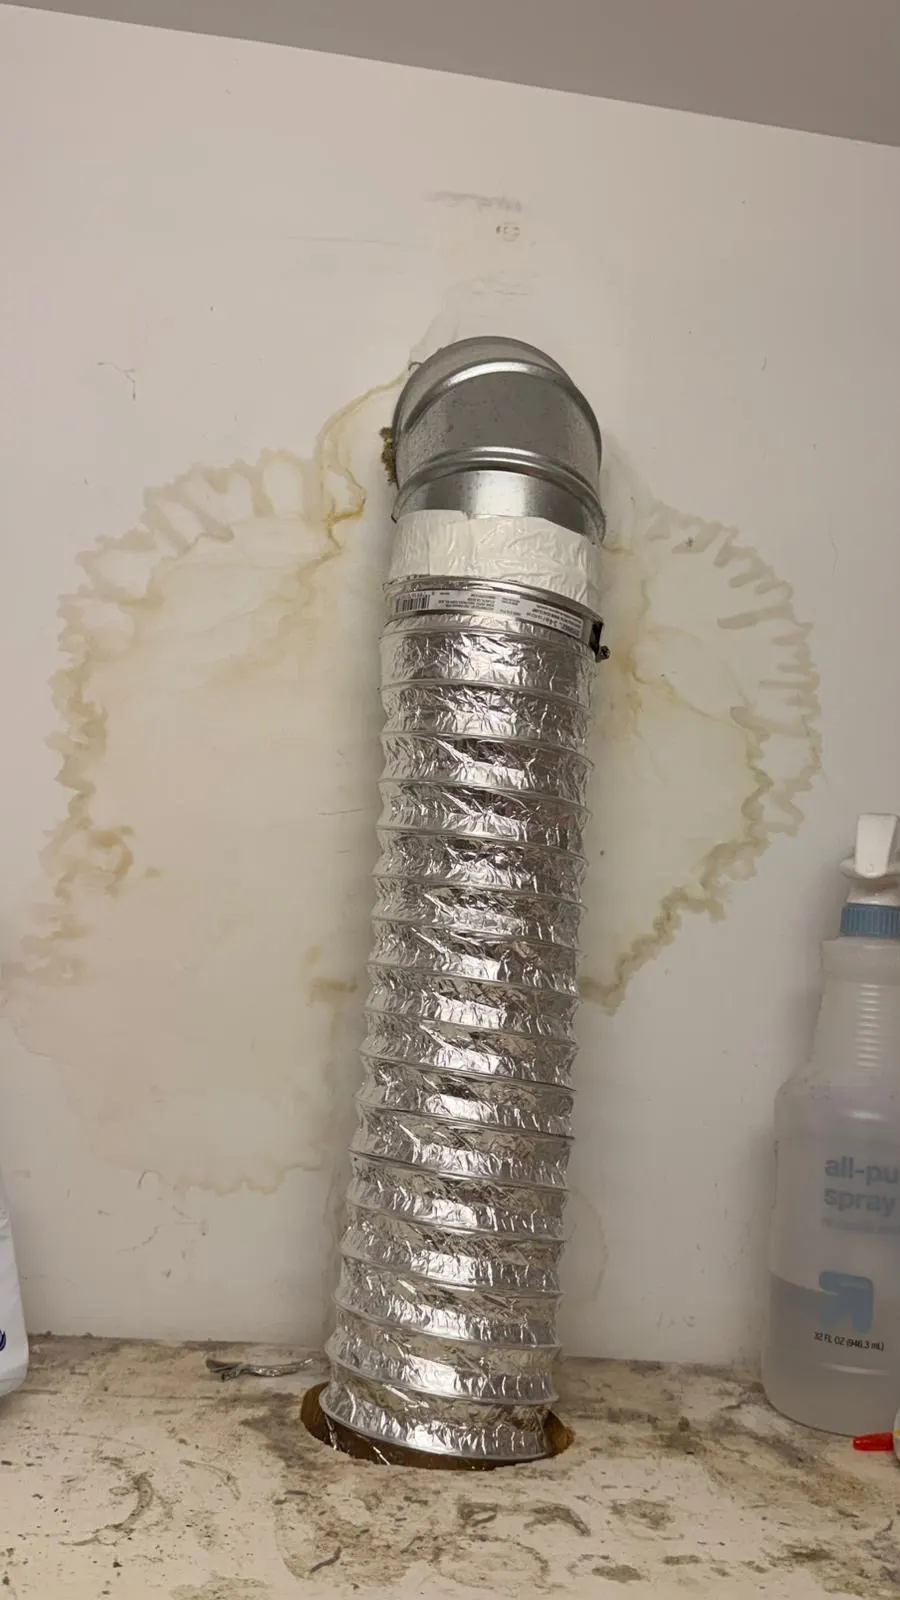
First, tearing. Thin foil flex was never designed to be scrubbed from the inside — a rotary brush can chew through it in seconds, and even hand-feeding a brush can open a seam. White plastic flex hose is worse: it should not be in service behind a dryer at all. A torn hose leaks moist, lint-heavy exhaust behind the machine, and the symptoms are subtle — a film of dust on everything in the laundry room, a musty smell, humidity where there should be none.
Second, crushing. The most common injury does not involve the brush at all: after cleaning, the dryer gets pushed back against the wall and flattens the hose into a kink. A crushed kink restricts airflow more than the lint you just removed, and the kink itself becomes a lint trap that packs solid within months. If your transition hose is foil or plastic, replacing it with semi-rigid aluminum is the cheapest meaningful upgrade you can make back there — and leave a few inches of clearance when you slide the dryer home.
What Are the Stakes If a Vent Stays Clogged?
The everyday cost of a restricted vent is boring: second cycles, higher electric bills, and a dryer aging faster than it should. The tail risk is not boring at all.
The U.S. Fire Administration (FEMA) reports an estimated 2,900 home clothes dryer fires each year from its own data. These fires overwhelmingly trace back to vents that were never cleaned — but a botched DIY job can put you in the same risk category while convincing you that you are safe. A vent with a plug of freshly disturbed lint wedged at an elbow has the same fuel and the same restricted airflow as a vent nobody ever touched. The false confidence is the dangerous part. For the full picture of how these fires start and how to prevent them, see our dryer vent fire safety guide.
DIY or Pro: Which Setups Are Which?
Here is the honest breakdown by configuration. If your setup is in the bottom half of this table, the brush kit is not saving you money — it is deferring a professional visit and adding risk.
| Your setup | DIY or pro? | Why |
|---|---|---|
| Basement dryer, straight run under 8 ft | Reasonable DIY | Both ends visible and reachable; brush plus shop vac genuinely works |
| First floor, 10–15 ft with elbows | Pro yearly; DIY touch-ups only with vacuum extraction | Elbows are exactly where pushed lint wedges |
| Second-floor laundry, run inside walls | Pro | Joints and clogs are hidden; a mistake is invisible until symptoms show |
| Roof-terminated vent | Pro | Ladder work, vertical climb, and a cap that collects lint out of sight |
| Foil or plastic flex anywhere in the run | Replace the hose, then pro clean | Thin flex tears under brushing; plastic should not be in service |
| Dryer already slow, hot, or smelling of burning | Pro, promptly | That is a rescue, not maintenance — disturbing a heavy clog makes it worse |
On cost: our dryer vent cleaning starts with a free video inspection, and you get a flat, written quote before any work begins — no trip fees anywhere in our service area, no surprise invoice, and no on-site upsell. Wisetack financing is available if you would rather split the payment. Every visit includes full-run brushing under HEPA-filtered vacuum, exterior hood service, and airflow verification with after-photos. The camera is the part DIY cannot replicate: it is how crushed hose, separated joints, and bird nesting get found before they become drywall repairs. For a full breakdown of what drives dryer vent pricing, see our dryer vent cleaning cost guide.
How Can You Tell If Your DIY Cleaning Worked — or Backfired?
Test it the same day. Run the dryer on a heat cycle and go look at the exterior hood: the flap should swing open firmly and you should feel strong, warm airflow. Weak flow after a cleaning means lint moved but did not leave.
Over the following week, watch for the backfire signals: clothes drying slower than before you cleaned, the top of the dryer running hot, lint dust or unexplained humidity in the laundry room, or any hot or burning smell during a cycle. Any of those means stop using the dryer and get the line inspected — the camera will show in minutes whether you are dealing with a wedged plug, a separated joint, or a crushed hose. Our guide on how often to clean your dryer vent covers the normal warning signs in more depth.
When Should You Just Call a Pro?
Call when the run is long, vertical, hidden, or already misbehaving — or when you simply want proof instead of hope. A short basement run with a brush kit and a shop vac is a fine Saturday job, and we will tell you so. Everything else is one straightforward visit: a free video inspection first, a flat written quote before any work begins, after-photos when it is done, and a licensed, insured contractor (PA 187935, insured to $2 million, Google Guaranteed) standing behind the work. Most cleanings take under an hour.
